
What It Takes to Run a Gas Line to a New Appliance
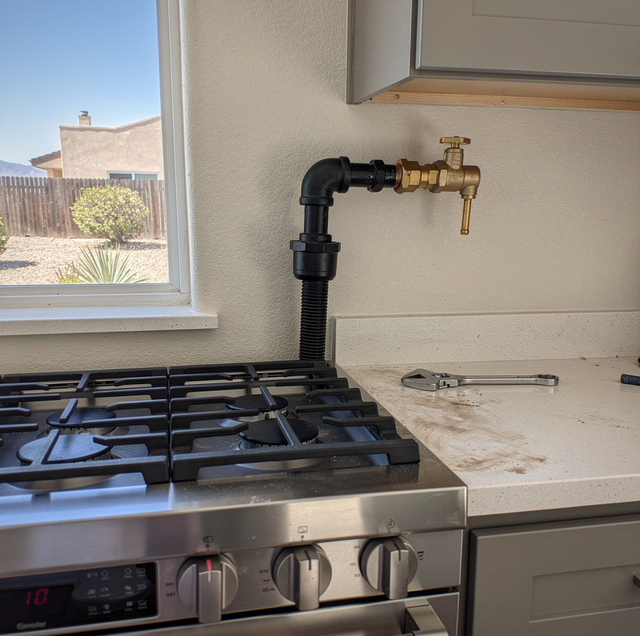
Quick Answer: Running a new gas line to an appliance, whether a range, a pool heater, a fire feature, or a generator, starts with a load calculation that checks whether the existing gas system has enough capacity to add another appliance without upsizing the meter or main line. From there, the job proceeds to pipe sizing, permitted installation, a pressure test, and a shutoff valve and a sediment trap at the appliance itself. Skipping any of those steps is what turns a routine hookup into a failed inspection or, worse, an unsafe connection.
Can the gas system already running through a house actually support one more appliance? That's the question a load calculation answers before any pipe gets cut, and it's the part of the job a lot of quotes skip past on the way to talking about the range, the pool heater, or the fire feature itself. A gas line project isn't just running pipe from point A to point B; it's confirming the appliance can get enough fuel at the right pressure the moment someone turns the knob, which means the whole system between the meter and that new connection point gets checked, not just the new run of pipe.
Step 1: Calculate The Total Gas Load
Every gas appliance has a BTU-per-hour rating: a furnace, a water heater, a range, a dryer, a pool heater, a fire feature, a whole-house generator. Adding a new appliance means adding its BTU draw to everything already connected and checking that total against what the meter and main line are rated to deliver. In an older home where a furnace, water heater, and range already draw close to the meter's rated capacity, adding something with a large draw, like a pool heater or a generator, can push the total load past what the existing meter can supply, which means the utility has to swap in a larger meter before the new appliance can be connected at all.
This load calculation also accounts for pipe length and the number of fittings between the meter and the new appliance, since gas pressure drops over distance and every elbow or tee adds resistance. A run that looks short on a floor plan can still call for a larger pipe diameter than expected once that math is worked through.
Step 2: Size And Route The New Pipe
Once the load calculation confirms the required sizing, the actual pipe is sized and routed. Most residential gas work uses either black iron pipe, threaded and assembled section by section, or corrugated stainless steel tubing, a flexible product that's faster to route through framing but requires its own bonding and support rules. Sizing depends on the appliance's BTU draw and the total run length: a pool heater or a generator, both of which draw heavily, often needs a larger diameter pipe than a simple range hookup even over a similar distance.
Routing matters as much as sizing. Interior runs typically go through framing cavities, floor joists, or exposed basement and crawlspace areas, with minimum clearances from other utilities and required strapping at set intervals. Outdoor runs, common for pool heaters, fire features, and generators, are usually buried at a minimum depth with a tracer wire laid alongside the pipe if it's the corrugated stainless product, so the line can be located electronically later without excavating blind.
Step 3: Permit And Inspection
A new gas line is one of the few plumbing jobs that almost never skips a permit. The permit exists specifically because a gas leak is a safety issue, not just a workmanship one, and inspectors check pipe sizing, support spacing, bonding, and the pressure test results before signing off. In older homes, an inspector may also flag existing gas piping that's visibly deteriorated or improperly supported while they're on-site for the new work, even though that older pipe wasn't part of the original scope.
Permit timelines vary by jurisdiction and by how busy the local building department is, but the practical takeaway is the same everywhere: scheduling the appliance delivery or installation date before the permit is approved is one of the more common ways a project stalls partway through.
Step 4: Pressure Test Before Anything Gets Connected
Before any appliance gets hooked up, the new line has to hold a pressure test, typically pressurized with air to a set psi and held for a specified duration to confirm there's no leak anywhere along the new run, including every joint and fitting. This step happens before the gas company or a plumber turns on the gas to the line, since testing with air rather than live gas keeps the process safe if a fitting turns out to be loose.
A line that fails the test gets traced, fitting by fitting, until the leak is found, most often at a threaded joint that wasn't fully seated or at a compression fitting on CSST that wasn't torqued to spec. Retesting after the repair is standard before moving forward, since a partial fix isn't something to assume works without confirming it.
Step 5: The Appliance Connection Itself
The last stretch of pipe at the appliance is where a few code details commonly get missed on the cheap version of this job. Every gas appliance needs its own shutoff valve installed within reach without disconnecting anything else, so the appliance can be isolated for service without shutting off gas to the rest of the home. Most appliance connections also require a sediment trap, a short vertical drop in the pipe just before the connection point that catches scale, rust, or debris traveling through the line before it reaches the appliance's burner or valve.
Flexible appliance connectors handle the last short stretch from the shutoff to the appliance itself, and these connectors have their own rating for length and BTU capacity; using an undersized connector on a high-draw appliance like a pool heater is a common mismatch that shows up during inspection. CSST installations also require a bonding clamp connecting the gas piping system to the home's electrical grounding system, since CSST's thinner wall makes it more vulnerable to damage from a nearby electrical event than rigid black iron pipe.
Why Older Homes Add An Extra Layer
Homes built before gas ranges, pool heaters, and whole-house generators were common often have a gas system sized only for what existed at the time: a furnace and a water heater, sometimes a dryer. Adding one more appliance to that system isn't just a matter of tapping into the nearest existing line; it usually means tracing the system back toward the meter to find where capacity actually exists, and in many cases replacing a section of undersized pipe rather than only adding a new branch.
This is also where black iron pipe installed decades ago is sometimes found to be undersized or, less often, to show internal corrosion that wasn't visible from the outside. A gas line project in an older home is as much about verifying what's already there as it is about running something new, which is why an on-site load calculation and a look at the existing system matters more than assuming the newest appliance is the only thing that needs planning.
Frequently Asked Questions
Yes, but it requires burial at the correct depth with a tracer wire alongside it, since the tubing itself can't be located by a metal detector the way steel pipe can. Manufacturer installation instructions also specify UV protection or conduit where any section of CSST is exposed above grade rather than buried or run through a wall.
Yes. Every appliance connection, including a fire feature, needs an accessible shutoff independent of any other appliance on the system, along with a sediment trap positioned just ahead of the connection to keep debris out of the burner assembly. Fire features typically use a manual key valve rather than a lever-handle shutoff, set inside a weather-protected valve box near the feature since it's usually installed outdoors rather than in a utility closet or crawlspace.
The gas utility gets involved to upsize the meter before the new appliance can be connected, since that's a change to the utility's own equipment rather than something a plumber can modify. Some utilities also need to shut off gas service to the whole home briefly to complete the meter swap, so that step is worth scheduling around rather than assuming it happens invisibly in the background while the rest of the project continues.
Yes, regardless of run length. A short run typically gets isolated with a test tee and pressure-tested on its own rather than re-pressurizing the entire existing gas system that's already in service, so adding one appliance doesn't mean retesting pipe that was already proven sound. Any joint can leak regardless of how much pipe was installed, which is why the test applies to the new section every time.
Often yes, if the new appliance's BTU draw is similar to the old one and the existing pipe, shutoff, and sediment trap are in good condition. A significantly higher-draw replacement, like swapping a standard water heater for one with a larger burner, can still trigger the same load calculation and sizing review as adding a brand-new appliance.
A pressure gauge connected to the line indicates any pressure drop during the test, and a technician then checks each joint with a soap solution or an electronic gas detector to pinpoint exactly where air is escaping. Most leaks trace back to a threaded joint that wasn't tightened to spec or a CSST fitting that needs re-torquing.
The pipe itself is the easy part to picture and the smallest part of the actual work. Everything that happens before it- the load calculation, the sizing math, the permit, the pressure test- is what decides whether the new appliance lights on the first try or the job comes back as a callback.
Adding a gas appliance — get a load calculation and a permitted gas line done right the first time. Plumbing Professionals serves Pasadena, Altadena, South Pasadena, and surrounding areas. Call (626) 247-3401.
